Wednesday, December 15, 2021

Snowy Cone

Snow Cone
Click to open video on Vimeo


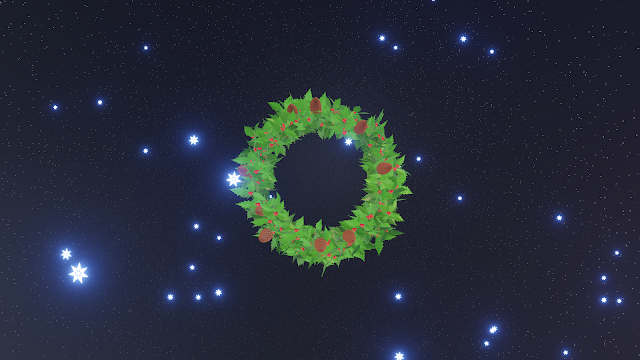
Had an opportunity to try out the revamped Geometry nodes in Blender 3.0.  I had done pieces of work with them during the year but the final version took a different approach and seems more intuitive.  This means that making more complex systems is a little easier.  

The other thing I wanted to push in this work was the lighting.  

The cone was built on a bezier curve with curves instanced on points along it.  Kernals were then arrayed along the curves. 


This meant that size, density and array angles could be modified.  In the animation everything was driven by frame number.  


The holly was built off of 2 leaf arrangements.  Growth was on a circle and was controlled by an empty. 


Stars were an icosphere with voronoi texture added.  Everything was inside it and then inside a volumetric cube. 


I rendered in Eevee so took advantage of a more stylised but atmospheric look.  

Edited in Premier Pro because I paid a whopping amount for the priviledge of accessing their software for another year so tried out some effects including some lens flare using assets made in Blender.  


Added the premade cones. 


Text was created in Blender converted to mesh and added an explosion and ran it backwards.   
Music was form a site called  https://freemusicarchive.org/  Lightblow - Sunlight under CC 4.0.

And that was it.  Took a while to make as I fumbled learning alot of new stuff but got there.
Put any questions you have in the comments.  


Monday, October 11, 2021

Landing on Planet


                                                                      Landing on Planet

Hello and welcome to what became the most challenging piece of Blender work I have created so far.  

This was a commission and that is what stretched me as I could not give up when things got challenging. If I had known how big this project would get I would have probably passed.  The reward was all the new stuff I learned along the way.  I wanted to do it as I knew it would push me out of all the lowpoly work I have done and towards realisim.  The other big draw was   ... its space. 

It started off with a storyboard.


Then a landscape which I ended up modeling as I needed some specific features.  It had to be not identifyable as Moon or Mars. 


Planet Landscape

For the planet scene I used the resource made available by NASA  https://svs.gsfc.nasa.gov/4720.  Changed up the colour a little. 

Moon Shot

Next were the vehicles of which there ended up being 3.  

The lander had to have a few moving parts and I would have done a proper rig on it in hindsight but it ended up being  wheels parented and a driver on each wheel.  

Lander rigging

The next vehicle was the cleanup vehicle.  This had to have a few specific features so I made it to order.  On this one I did rig the wheels as the vehicle had to move in circles.  I used rigacar to rig all 6 wheels. http://digicreatures.net/articles/rigacar.html .  This is a fantastic addon with great instructions.  I had not used it before but it was great and easy to animate using a follow path modifier.   The big disappointment on this vehicle was the laser.  I wanted to use a different approach to render but rendering time was limited so I went with a basic solution.  

Clean up Vehicle

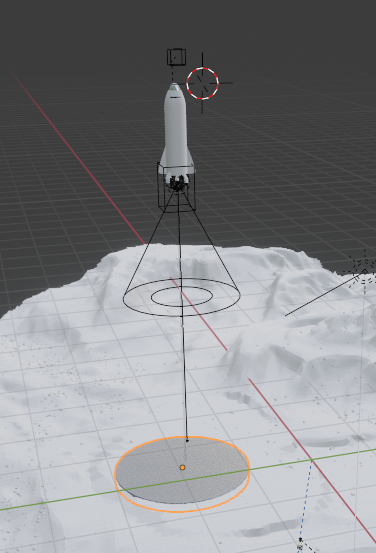
The final vehicle was the spaceship which was deliberately non descript.  It was a simple design.  The dificulty on it was adding  the smoke and heat.  This all ended up being parented.

Space ship landing

Thats a summary of the major assets.  
I will go through some of the more complex effects in the next installment.  If there is something in particular you would like to know more about drop a note on Twitter. I am planning on creating some YouTube videos to go in more depth on those.   


Friday, July 30, 2021

99 Ice-cream a Journey


99 Ice-cream a Journey


As i was working on some client work I had to come up with some effects.  Its always better to stick with tried and true methods when doing client work but I have found doing 3D work means you almost always end up overcoming challenges (problem solving) on the job.  The down side is that there is limited time to explore. That was where this project evolved from.  I took some elements and pushed them and created this short.  

It was all created in Blender and used the ocean modifier and the explode modifier. I added the heat shimmer as a post effect in Premier Pro.  

Behind the scenes


I have realised to be efficient doing these is to choose what needs to be done in 3D and what can be added in post.

As rendering has serious time and environment cost I have thought more about it and want to explore utilising Unreal Engine to capture these kinds of animations.  

Unreal are holding a course over the next few weeks as an introduction to its uses in animation and I am enrolled to see what is possible. 

After the first week I can see the possibilities but there is a steep learning curve.  

Stay tuned. ...


Big Bear Game Art

  I started creating a series of promotional art for a ficticious game.  This was to practice going through the design process.  I have foun...